Because there are so many different version of Android compiled and customized by so many different manufacturers, it’s impossible for me to make a bulletproof guide with screenshots. These steps are just to nudge you in the right direction. Your device will most likely look different than the screenshots. The screens were taken on a Motorola Droid Razr.
In order to switch from your old Harley mail to your new Google Apps account on your Android device (phone, tablet, whatever), you’ll need to first remove the current account and then setup a new one. If you’ve never had your Harley mail on your device you can skip down to the add account instructions below.
Removing Harley Accounts
Remember, this is just to give you the general idea, item locations and names might be different on your device.
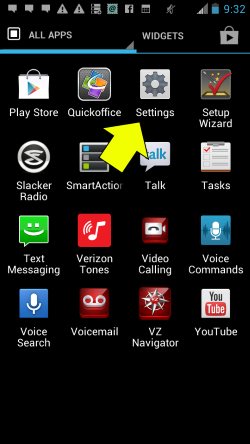
- First view all your apps by hitting the button with the 9 dots
- Tap on Settings
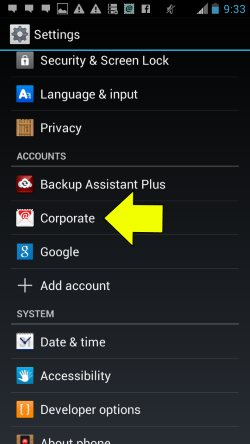
- Scroll down to the accounts section and tap Corporate or Exchange
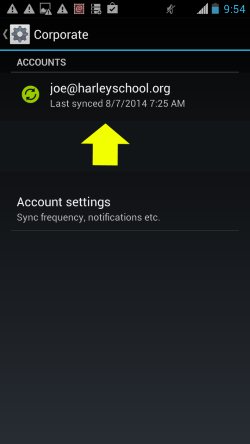
- Tap on the Harley account (probably shows as your Harley email address)
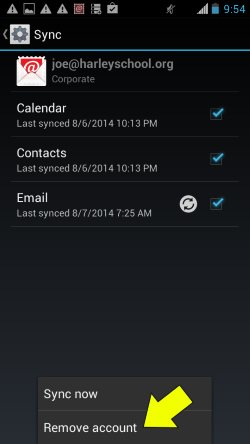
- Hit the menu button and select Remove account from the popup menu
 |
 |
 |
 |
Adding your Google Apps Account
Remember, this is just to give you the general idea, item locations and names might be different on your device.
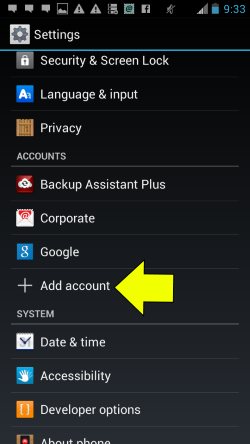
- Tap on Settings
- Scroll down to the Accounts section and tap Add account
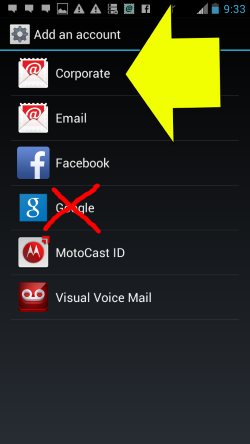
- Select Corporate or Exchange, ***NOT Google or Gmail***. This doesn’t make much sense but trust me on this.
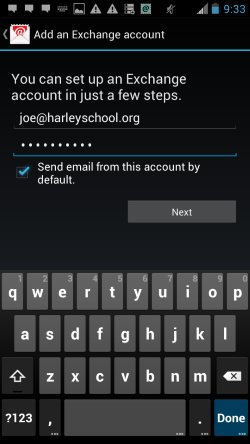
- Enter your email address and password and tap Next.
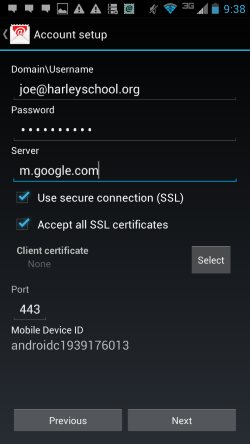
- You should be presented with more options. Type your email address as the username, enter your password and enter the server as m.google.com. Make sure Use SSL is selected.
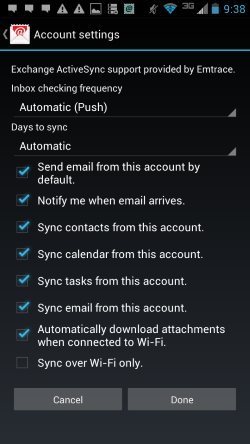
- Next select all your sync options and you’re all set.
Data from your mailbox will slowly start showing up. It might take an hour or so for everything to appear.
 |
 |
 |
 |
 |
 |
If you setup your Google Apps account as a corporate or Exchange account on the device, it should look and act identical to your old Harley account.